Lab Partners

Lab1.png

Coolest. Illustrations. EVER.

Some mid-week inspiration to cheer you up!

About:
Hi we're Lab Partners, two people that love working together on all sorts of things. Especially illustration and printmaking. In fact, if we had happened to sit next to each other in 8th grade science, we would have spent most of our time doodling in each others notebooks.
Lab2.png
We currently reside in beautiful San Francisco with our two enormously entertaining tabby cats. When we are not designing we fill our time with flea markets, thumb wrestling, and exploring the bay area.

Lab6.png
More:
Blog
Shop
Flickr
Twitter

Lab3.png<Lab8.png Lab4.png<Lab7.png   Lab5.png

Glass Tile from EVIT

EVIT1.png 
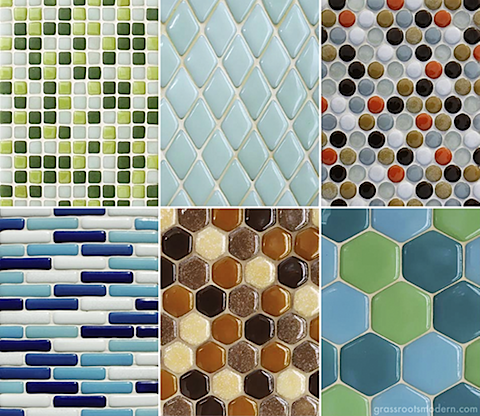
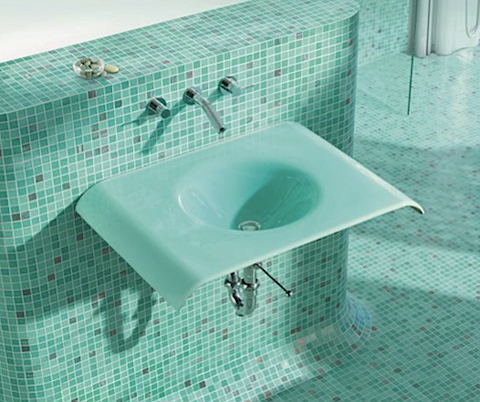
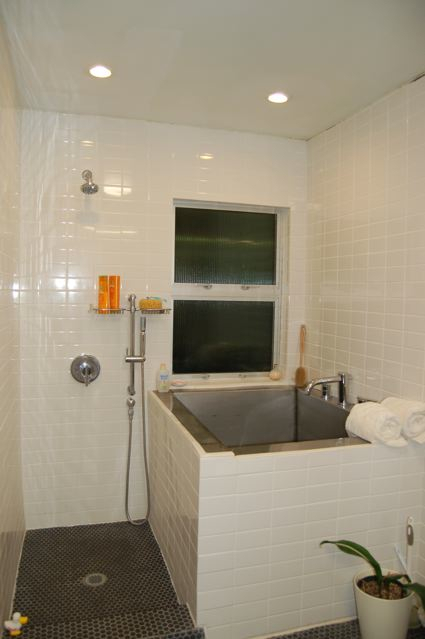
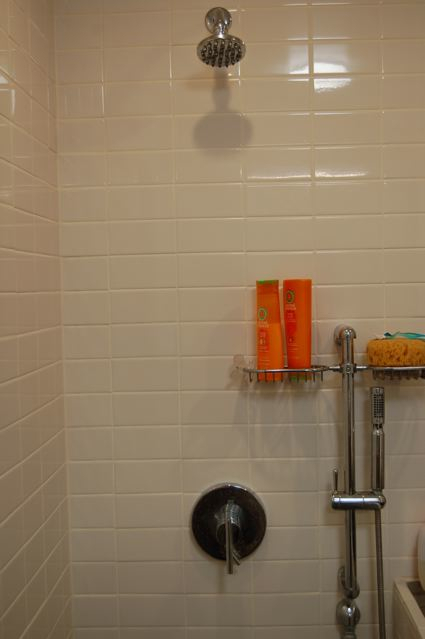
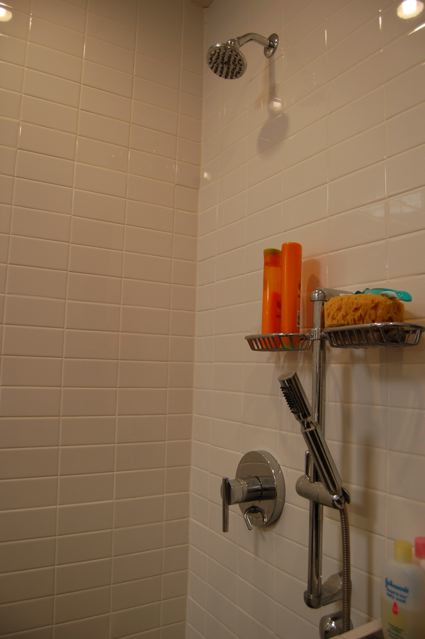
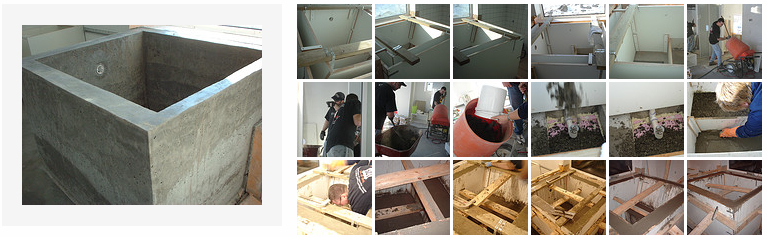
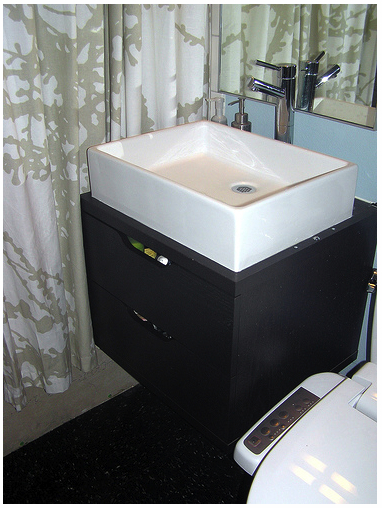
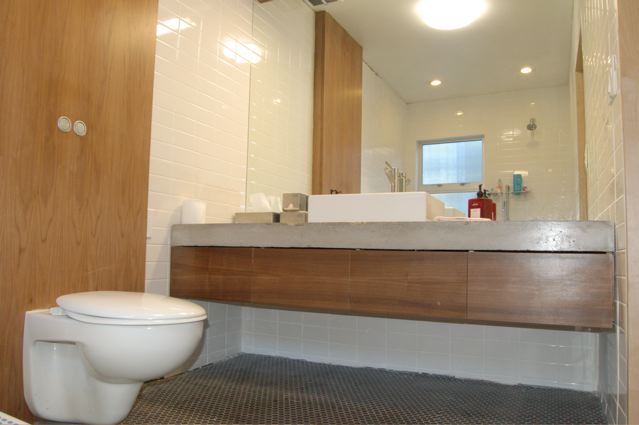
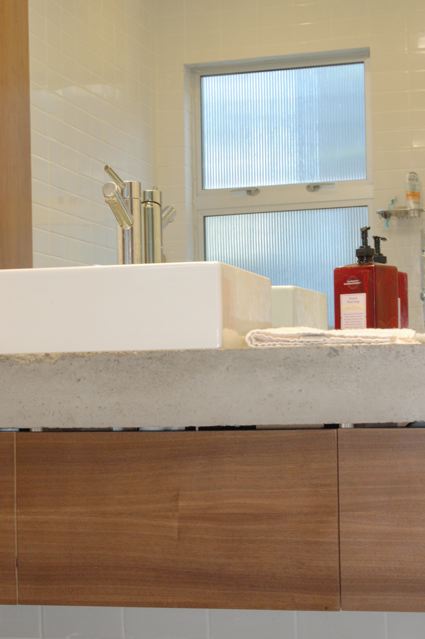
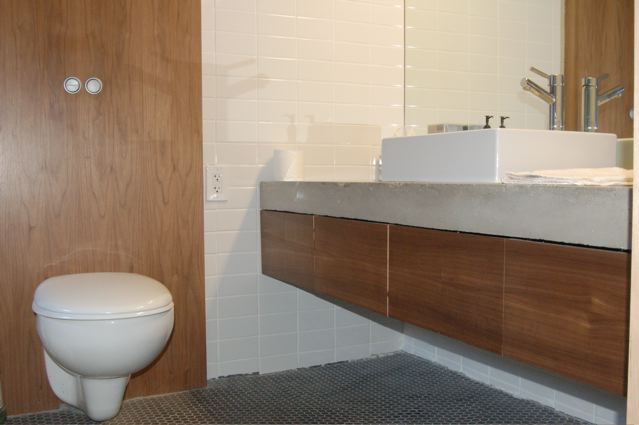
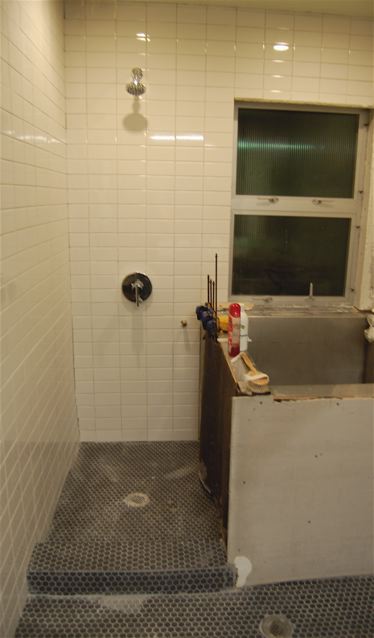
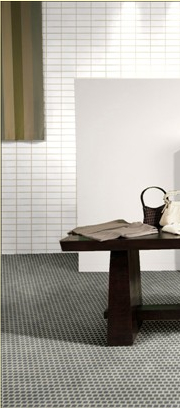
Oh dear. Those Italians really know how to woo a girl. These modern glass tiles from Italian company EVIT are really something else. Can you just imagine a bathroom covered in those bubble tiles in clear/white? What a [gorgeous] statement that would be. Check out the full line - over 65 colors in all shapes, sizes, and sheens. EVIT2.png www.evit-srl.it

[availability in the US is not apparent, but contact EVIT directly for purchasing inquiries]

via

Stardust Glass

Stardust.png

Check out these eco-friendly glass tiles from Stardust Glass! Each tile is handcrafted from 87-97% recycled glass content. Formed from molds instead of machine pressed, each tile is unique, providing a more personal look and style.

About Stardust Glass:

We are dedicated to reducing our environmental impact through use of recycled pre-consumer scrap glass, typically headed for the landfill, and through our commitment to using recyclable materials for product packing and shipping. In addition, we use a kiln to fuse our glass tiles, rather than a furnace, which uses more energy and produces harmful emissions.

We have established and continue to develop our reputation for artistic and innovative, hand-crafted recycled glass tiles, sold at a competitive price for use in the home-improvement and green building industries. We are proud to treat customers and the community with a reputation of professionalism, expertise and environmental consciousness.

Check here for a list of dealers or contact Stardust Glass directly for purchasing information.

Tissue Box by Essey

Tissue.jpg

Chalk this one up in the trendy column. The new Tissue Box from Essey brings back the award-winning crumple of its predecessor, Bin Bin. Designed by the same John Brauer, Tissue takes its queue from the contents within. Bauer says about the object: "The idea came to me when I passed a tissue box in Japan and noticed the crumpled paper sticking out. In that particular case, the box cover did not reflect the content. I wanted to have balance between the cover and content to give the product a relevant identity." I want to know, did this tissue box passing commence before or after the creation of Bin Bin? Just curious!

Tissue Box available from Unica Home: $30

Armadale House

JCB1.png

Really beautiful home from Australian architecture firm Jackson Clements Burrows. The Armadale House was an alterations and additions project to an existing Victorian home that had been previously renovated in the 80s. The project involved a complete refurbishment on the existing structure as well as an addition of a new upper level. This upper level was divided into two private zones for the children and parents. While it definitely looks great from the outside, I'm most excited about that gorgeous white kitchen! And that master bath!
JCB2.png
See more projects here!   

via

JCB3.png

Wall-Mount Sinks

WallMount1.png

I've been scouring the web for a wall-mount sink for a certain tiny little bathroom that resides in my home. I've seen some cool ones from Kohler, but I don't really want to spend a thousand dollars. There were a couple that caught my eye on Overstock as well, but I'm still not quite satisfied. Has anyone seen any modern-looking, wall-mount sinks that won't break the bank? Share your finds, and links, please!

WallMount2.png

Images:
Escale Wall-Mount Lavatory by Kohler: $500 - $650
Tableau Wall-Mount Lavatroy by Kohler: $1000 - $1500

The Last Bathroom Update

200803040729I realized yesterday that I never put up any last pics of our bathroom to show our shower completely finished. It has been done for quite a while now, and we really love it, especially the dual showerhead. To pull the whole dual showerhead off on the cheap we ended up going with a Danze Parma shower/tub combo. The Parma has the tub diverter right next to where you turn the water on (instead of a pull up thing on the tub spout) so it makes for a clean look. Instead of diverting to a tub spout, it goes to our adjustable shower wand. Set it somewhere in between and you get dual shower heads! The tub/shower combo was around $350 and the wand was about $150. $500 isn't exactly cheap by my standards, but compared to any other dual head systems I could find it was a steal. More pictures after the jump. 200803040729-1 200803040730

Making a Concrete Ofuro

200712280722When we were first looking into making an ofuro, one of the things we considered was pouring one out of concrete. The good thing about concrete is that the material is cheap, and with a little hard work it lends itself well to the DIY approach. We quickly bagged the idea because there is no possible way our floor could support the weight. This morning I stumbled across an old post on Apartment Therapy with a gorgeous DIY bathroom built for under 3k which includes a concrete ofuro. The soaking tub only cost about $200 according to the owner splat girl. She did mention that it was a lot of work though. Check out her flicker photo set and the Apartment Therapy post.

Ikea Hack Vanity

200711150653This was sent in by a David M a long time reader. He is currently remodeling a mid-century modern home in Renton just south of Seattle. While redoing his bathroom he wanted to put in a vanity similar to the Kohler Purist but didn't want to spend $1,500. With a little creativity he was able to take this Ikea STOLMEN and make it work as a wall mount vanity. I think you will agree when I say it looks great. The price of the STOLMEN was $80, which makes it a very affordable alternative. He finished it all off with a sink an faucet similar to what we have in our bathroom. More pics here.

Bathroom Vanity Finished

Dsc 0019-16Things happen slower when you do them yourself. Over a year ago I posted about our bathroom vanity that I had just built. I did a walnut base and a concrete countertop. The only thing that was left to do was the drawers. It sat that way for over a year, but it's finally finished. I was able to do all the drawer fronts out of one continuous piece of wood so that the grain pattern follows all the way across. It's those little details that make me really like it the most. I opted to use no handles, but instead beveled the bottom edge of the drawer for a comfortable grip. I think it turned out pretty nice. It's funny because I really love all the walnut in the bathroom, and very little of it was planned. The walnut behind the toilet was because we didn't have enough wall space for the wall hung tank in the wall, and the walnut above the mirror is because they had to cut the mirror short to get it past the sink when installing it. In hindsight, I wouldn't have done it any different.

Dsc 0020-15 Dsc 0025-7

Eva Solo Toilet Roll Holder

 Billeder Products-Trollholder-Dele Trollholder Foto1Our bathroom is almost completely done. We finally finished the vanity a couple months ago (more on that later) as well as installed the hand held shower wand (more on that too). All we have to do now is a little touch up paint, add a towel hook and a toilet paper holder. This one from Eva Solo caught my eye because it is very simple and I kinda like the way it sticks out of the wall. The roll is held in place by those spring loaded black parts. No idea on pricing yet as it is due to come out sometime this month along with their other new products, but how much could a toilet paper holder cost.

waterbury bath mat + stool

 Media We Pb2 P B269 Pip We07C145D F07 070619150225 Pip LargeWhen we designed our bathroom we always planned on forgoing the standard bath mat in favor of a wooden one. We even placed an extra drain outside of the bathtub so that when you stood on a wooden bath mat the water wouldn't just pool underneath. I had planned on making my own out of Ipe, but I have to admit I am tempted to just get this teak one from West Elm. I even love the matching stool. Available from West Elm $89 - $129.

Lucy Ave - The Beginning of the End

 7094467Sheetrock work began a few days ago. This is usually the mid-point in home construction. Since we have very little finish work required, i.e. no window or door trim, we feel like we are well past the mid-point. Sheetrock will wrap up tomorrow and preliminary steel posts for the stairs will be installed later this week. Doors were installed just before sheetrock. Garth found an awesome set of interior doors at a great price, less than $200.00 each! The remainder of the radiant system will be installed and the gypcrete floors will all be done by the end of next.It took some time and negotiation but we finally have a solid game plan for the stairs (thanks to Kenner for the coordination). We are going with a clear varnish on the steel instead of paint. We chose square tubes and stainless steel cable for the railings. Greg with Premier Metal Works is constructing the stairs and rooftop railings. For anyone wondering we chose the Kohler Purist series faucets for the upper floor bathrooms. For the first floor powder room we chose a "Vattern" compact cabinet/sink/faucet combo from Ikea.  7094471  7094463

More tiles and more walls

Dsc 0003-11Dsc 0017-7 I finally finished setting all the tiles in the bathroom, thanks to my stepdad who came down on Saturday to help. We spent almost 9 hours straight on Saturday setting tile. I just have a couple of small little trim pieces to put up, and then I have to grout and caulk the whole thing. Besides that, the list of things to do in the bathroom is quickly shrinking. We have one more light to install, and a fan. We also need drawers for the vanity and trim for the door and it will be all done. As far as the addition, they put up a couple more walls yesterday, including the walls that connect into our existing house. Today I think they will probably do roof joists, and hopefully some exterior sheathing.

More pics after the jump. Dsc 0020-9

The Tiling Begins

Dsc 0041-6 Dsc 0039-2I started tiling our bathroom last week. I set the floor tile on Wednesday night and grouted it on Friday. Let me just say for the record, that grout is a wonderful thing. It makes a not so hot tile job look pretty darn good. On Saturday I put up the rest of the dura rock (minus one side of the tub that I was still clamping and gluing) and started on the wall tile. My stepdad and father in law both stopped by Saturday night and helped with all the wall tile. It was a huge help too. I never could have gotten so much done without them. I ended up getting close to half the bathroom done, and we are getting very close to being able to shower. We can hardly wait!

Getting Ready to Tile the Bathroom

Dsc 0013-9Dsc 0014-5We spent last weekend and a couple of nights this week getting everything ready to tile in the bathroom. Since we want to be able to get the whole floor wet without worrying about it getting funky under the tile we went ahead and covered the whole floor with a PVC membrane. It is a bit overkill, but at least we know it is done right. Next we had to get the slope correct so that the water goes toward the drains. I cut some thin strips of wood with the proper slope to help guide me as I put down the drypack. It ended up raising the floor almost 2" at the far side. The first time I did the dry pack I made it too dry, and I had to go back and redo it all a couple days later. I got it right eventually. We are going to spend the weekend tiling, and will have all the floors done, and hopefully a good deal of the walls too. My wife can't wait, it has been almost 8 months since I tore our old shower out. Did I ever mention how wonderful and patient she is?

Subway Wall Tiles

200702130653Over the weekend we finally got all the wall tiles for our bathroom. We had really wanted to go with something like the Ann Sacks Avalon. I absolutely love the skinny rectangular shape. Unfortunately with 200 square feet of tile, the $8 price per square foot doesn't work out to be a small number. We still wanted something similar to that shape, and were able to find the next best thing at Home Depot. They had Dal Tile 3 x 6 white subway tiles on clearance for $1.60 a square foot. We had to go to two different stores to find enough tiles, but it was very affordable. We plan on putting them up using a column pattern (one directly above the other) instead of the more typical brick pattern used with subway tiles. We also got all the sand and concrete we need to float the floor before we can tile, and the plastic membrane that goes down as a first layer. There is a good website here that explains the process.

Plumbing the Shower

Dsc 0032-3Dsc 0010-5So this weekend, I was battling a bad cold, but I still had time to work on the shower a little bit. It was actually a multiple day project that started last weekend. First I had to install all of the floor drains. There is one inside the shower area, and one just outside the ofuro tub as well. The second will act as a drain for the tub overflow, and will be covered by a wooden shower mat eventually. After putting the drains in I had to frame in the ofuro tub, which meant ripping it all out again, and building a frame for it to sit in. After I got it all framed up, I poured a 1/4" skim coat of vinyl concrete to level the floor out. Next layer will be some sort of waterproof membrane, and a drypack layer to get the slope right. Last will come the tile. I also got our shower all plumbed. Until now all the plumbing in the house (except the radiant) I have done in copper. There were a couple angles in this project that made it impossible to do with copper, so I ended up doing it all in PEX. I have to admit, it was a lot easier and a lot faster. I can see why most people are crossing over. The walls all got a layer of 30 lb building paper, to help waterproof them, and then durarock paneling. Last will be the tile, and we will finally have a functional bathroom.

More pictures after the jump.

Dsc 0018-5 Dsc 0019-7

We bought a shower finally

 Images P B000En6P7U.16. Sclzzzzzzz Ss384 V57221049  Images Danze Large D464603Bn-LgWe finally got around to buying a shower. We used some left over Christmas money and splurged a little bit. We ended up with the Danze parma tub/shower combo shown above. We obviously don't need the tub part, but that lets us use the diverter that is below the faucet handle to switch the water over to the handheld faucet that is mounted on the bar. Total price for everything was close to a staggering $370. Now all I have to do is get it all installed.

Bathroom Window

Dsc 0011-2Dsc 0020-4Just when you thought I was out of walls to knock down. I finally got around to installing our Milgard window in our bathroom. It (like many of our projects) has been sitting in our living room for almost a month now. I didn't really plan on making hole quite that big, but some of the old sheathing was water damaged from the poor installation of the previous window. I ended up just ripping it all out, framing in a new wall and installing the new window. Install was a breeze, and it looks really nice. The window was a special order from Homedepot. It's a Milgard thermally broken aluminum awning window. We went with the narrow reed for some tasteful privacy. It ended up running us close to $800.

Comments? Post them here in the forums.

Please excuse me while I pay some bills...